Visual Effects in “Limbo” by Playdead
What is Limbo?
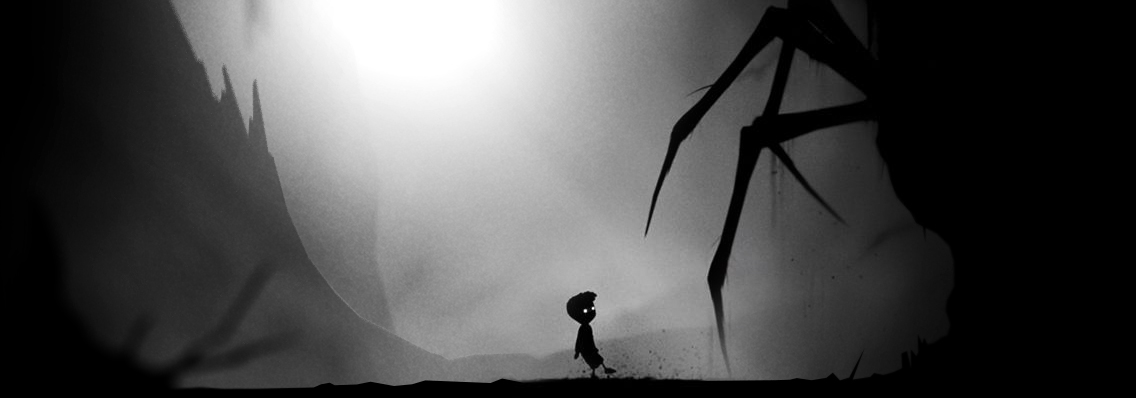
Limbo is a black-and-white video game most noteworthy for its unique puzzles. Its story mimics Dante’s Inferno with places and events overlapping. 2
The game was created by Arnt Jensen and Dino Patti, afterwards forming the company Playdead. Development took over three years before its release in 2010.
Engine, Effects, & Sprites
Limbo uses Box2D for its physics and OpenGL for the visual effects.
A large image consisting of smaller images, called a “sprite sheet”, is spliced and used for objects such as the player’s limbs, boxes, and for the environment. For example, a sprite sheet from the game looks like this:
The Game Consists of Three Depths:
- Foreground: Closest to you, but out of focus.
- Midground: The focus of the game.
- Background: Behind everything, setting the scene and contrasting the midground.
Each depth moves on its own in relation to the player; this effect is known as “parallax”. The foreground moves more, the midground moves with, and the background moves less than the player.
Recreation Steps:
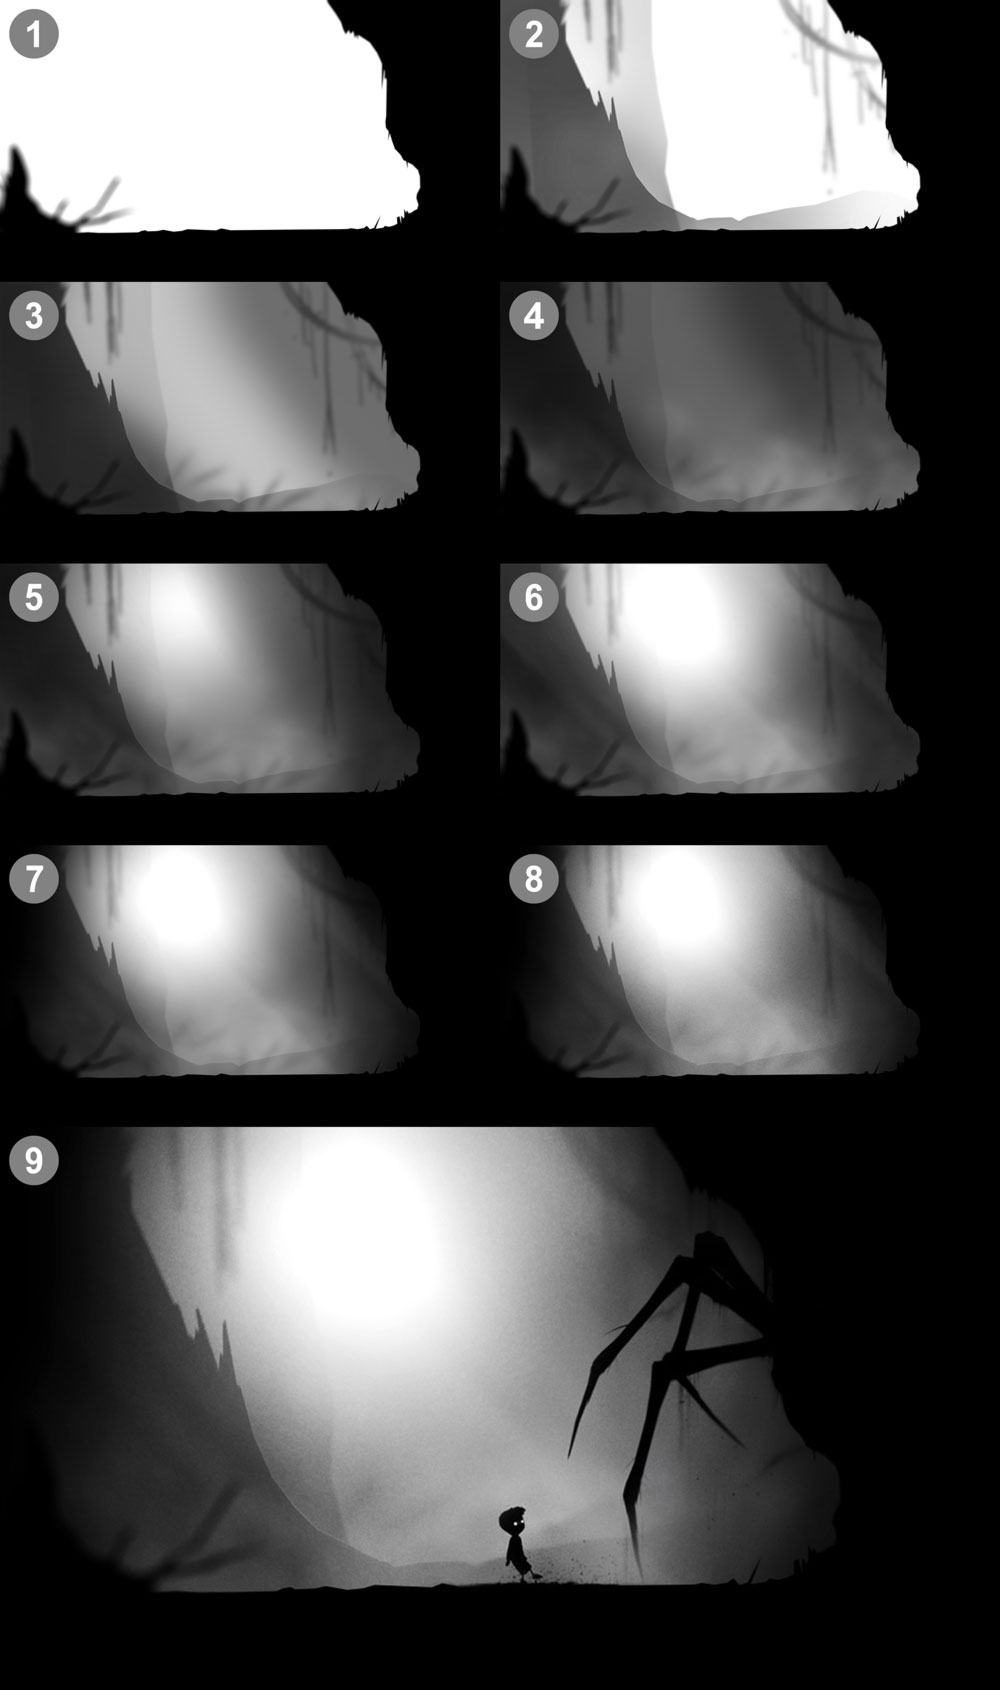
- First start by adding blurry objects to create the foreground. The ground becomes the midground
- Trees and vines become the background. Everything in this scene should be black and only differ in opacity.
- After that, add some blurred light behind the midground, to darken the scene. Create some shadows in the light as well.
- Then import a smoke image and mask out some plant shadows, overlaying this layer behind the midground but above the previous light layer.
- Create a concentrated exposure layer on the middle, masking the rest of the scene. This adds a spotlight effect.
- Proceed to add diagonal light rays with varying opacities to add to the overall brightness.
- Then add a negative exposure layer is to act as a vignette, darkening the edges. Be sure to only darken the outer corners and make it very gradual.
- Finally, overlay some generic grainy noise.
- An optional step is to use sprites from the spritesheet to recreate objects and characters.
Download the Photoshop project file below, there’s a lot of smaller effects unmentioned.
Please respect the copyright of Playdead.
Download recreated scene (.psd)
1. Box2D.org
3. Xbox UK
4. Playdead
Related posts
![]()
SimmiMega: Embedded Game Engine/Editor (Dev Log #1)
When I was first learning C and 2D arrays, my mind immediately went to old-school dungeon crawling games like NetHack. I made a simple game for an embedded system where you walked around using a 2D array as the world and characters as the objects. After finishing that project for the final in my C…
![]()
SimmiMega: Micro-Game Making Machine (Dev Log #2)
After the last dev log, I was trying to wire the resistive touchscreen wires directly to some of the unused analog pins left on the ESP-32, but I realized I didn’t have enough pins left. Some of the pins on the ESP-32 were input only, and some didn’t support analog reads. Instead, I ordered some…