Create a Simple Mobile Game in Unity3D
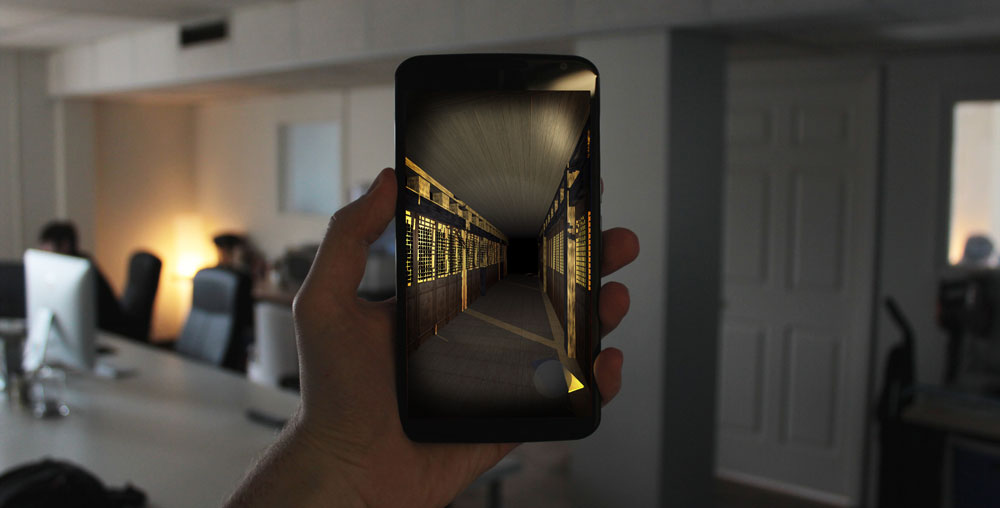
The Finished Mobile Game: ![]()
Follow this tutorial to learn how to export to Android.
Intro to Mobile Apps
In order to make a mobile game, everything but the bare basics must be stripped away. Mobile developers are limited in the processing, graphics, and screen space of the game. Therefore, the task of creating a good-looking and smooth-running game becomes quite a challenge for those unfamiliar with the “nitty-gritty” of game engines. For instance, we’re looking at kilobytes instead of megabytes for textures, little to no post-processing effects(motion blur, color correction, etc.), and overly-simplified physics for starters.
Here are some tips/tricks to create your own mobile game.
Setting Up the Player Object
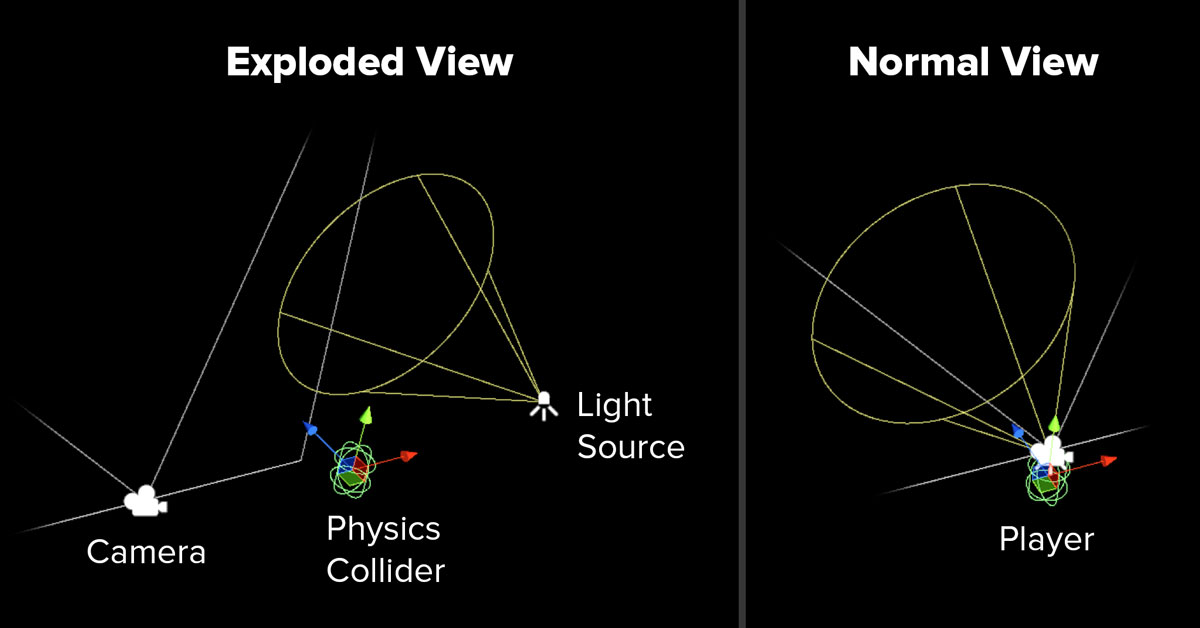
A simple player object consists of a camera, a physics collider, and a light source (for a flashlight).
To play the game, the player needs to move and look around. In the example, I use an onscreen joystick and the device’s accelerometer to move the player and the camera.
Joystick
The onscreen joystick are based off this YouTube tutorial. Download the C# script used, here.
Camera Accelerometer
The camera movement is controlled by this JavaScript script that reads the accelerometer data of the device and rotates/tilts the camera accordingly. This script also works for VR(Oculus, Cardboard, Gear, etc.).
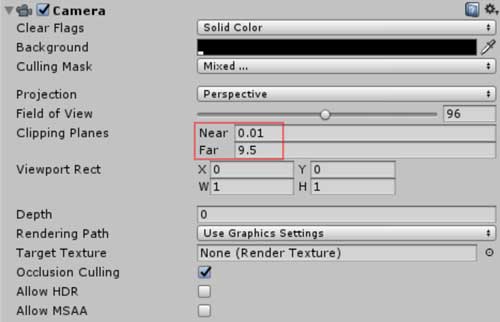
Camera Settings
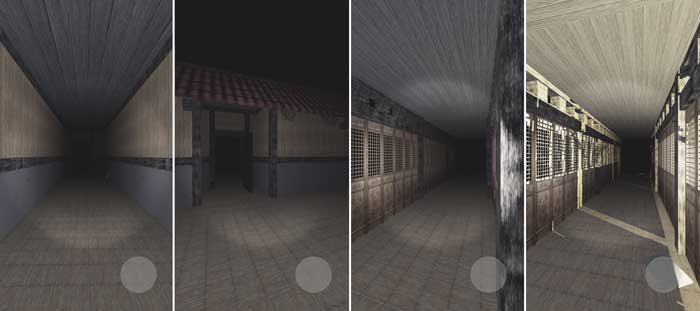
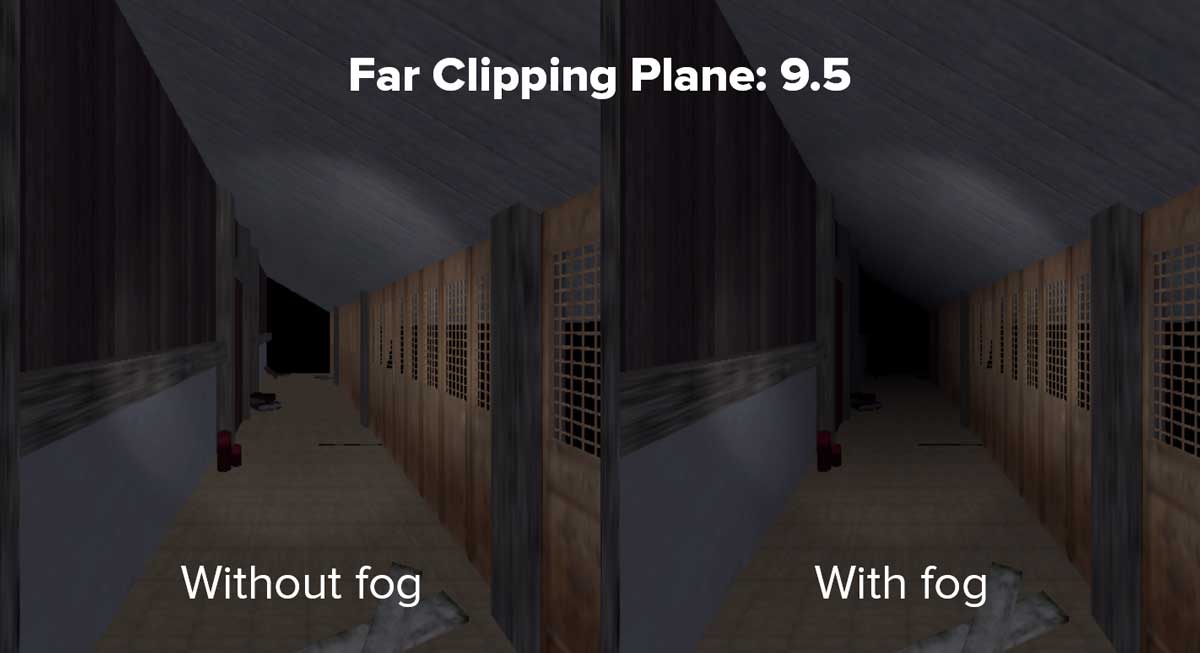
Change the clipping plane property of the camera so that the far value is as small as possible. This decreases how far the camera renders at any given moment. An easy way to hide this effect is to add fog to blend the clipping to black. (I’m using radial fog—not the built-in distance based one.)
Setting Up a Mobile Optimized Game World
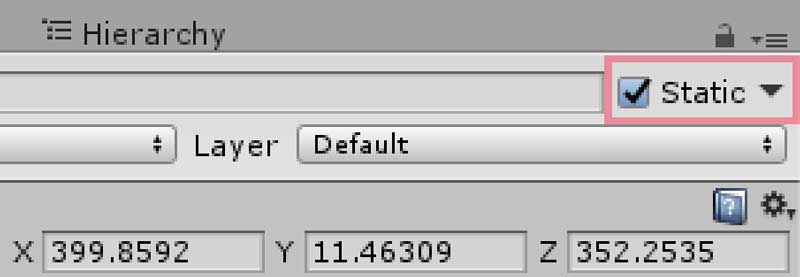
- Set Objects to Static. Set non-moving objects to static. We’ll see a setting later that combines static meshes to optimize performance.

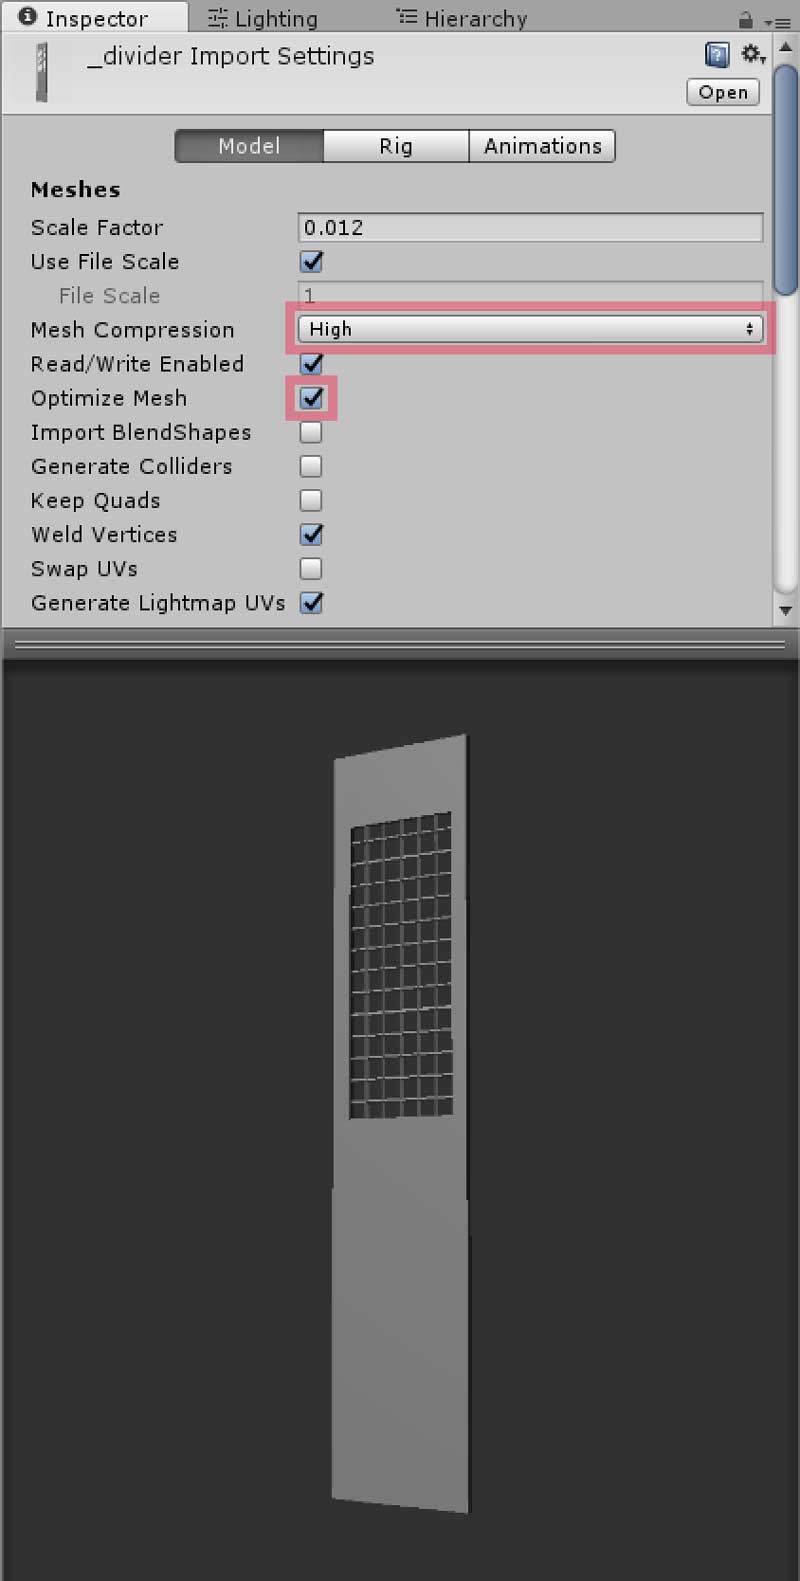
Setting GameObjects to static is very important for mesh optimization and lighting. - Mesh Compression. When importing models, set mesh compression to high to allow Unity to optimize the mesh. Overall, this will decrease the triangles/polys rendered every frame.

Enable high compression and mesh optimization to allow Unity to work its magic. - Compress Textures. Resize textures to be as small as possible. All textures in the example are under 800kb, such as the walls, floor, and timber. Also, remove all but the albedo texture. Rendering normal maps puts additional strain on the device.
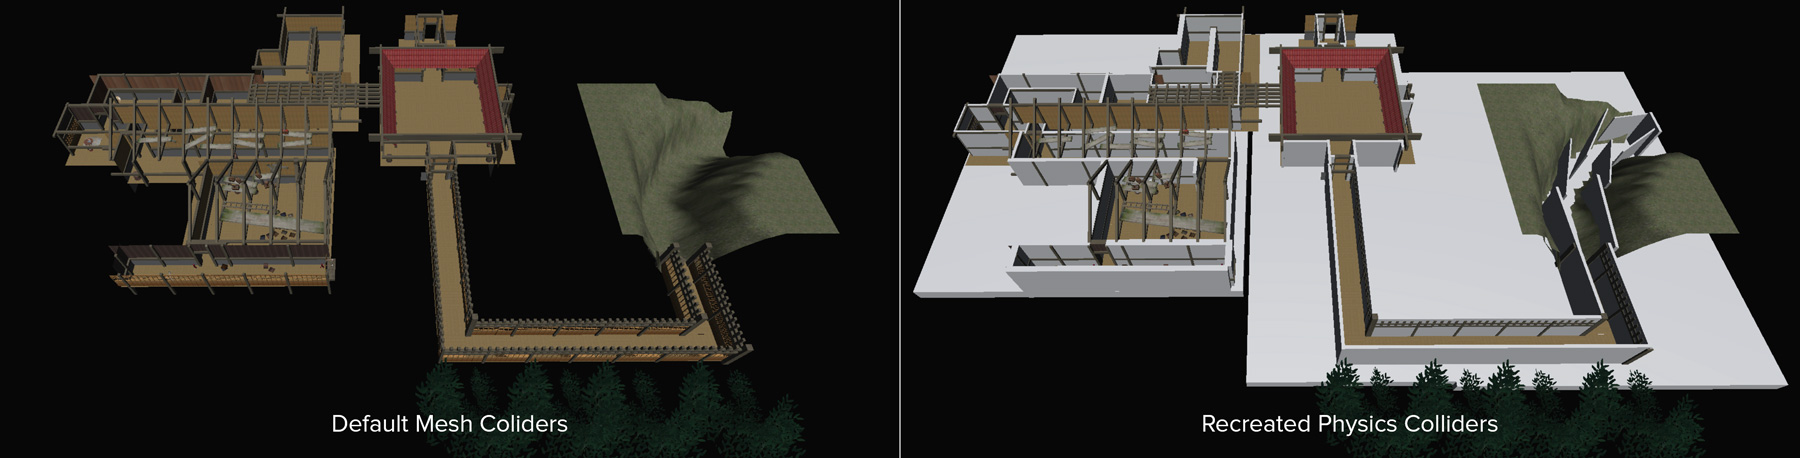
- Eliminate Mesh Colliders. (Optional) Mesh colliders are what Unity creates to enable physics on objects of unique shape and size. Using them on mobile is not recommended. I recreated all the colliders with box colliders instead and this helped the terrain render with a much higher FPS. If physics is is taking up a large percentage in the profiler, this may help. However, this step may take too much time depending upon the complexity of the scene.
Mobile Build Settings
Change the build settings of your project to look like the following screenshot for a smooth running game. Most of these settings should only be used if you know what you’re doing.

- Set Pixel Light Count and Texture Quality to as low as acceptable.
- Settings to disable are Anisotropic Textures, Anti Aliasing Soft Particles, and Realtime Reflection Probes.
- Shadows run best when set to hard or off completely and at the lowest acceptable resolution. While you’re at it, set a limiting distance similar to the clipping plane distance for the shadows.
Scripts Used
Several simple and reusable scripts are utilized on a plane with a box collider set to “Is trigger” throughout the game.
- A jumpscare script plays a sound clip and another GameObject/Light is made visible when the player walk through it. The tutorial can be found on YouTube here, and the added functionality for lights can be downloaded here “JumpScareTrigger.js”.
- A show object on trigger script shows an object when the player triggers it. Download “GameObjectShow.cs” here.
- A hide object on trigger script hides an object when the player triggers it. Download “GameObjectHide.cs” here.
- A text display script, shows text onscreen after being triggered, Requires a Text object present and attached to a Canvas object. Download “TextTrigger.cs” here.
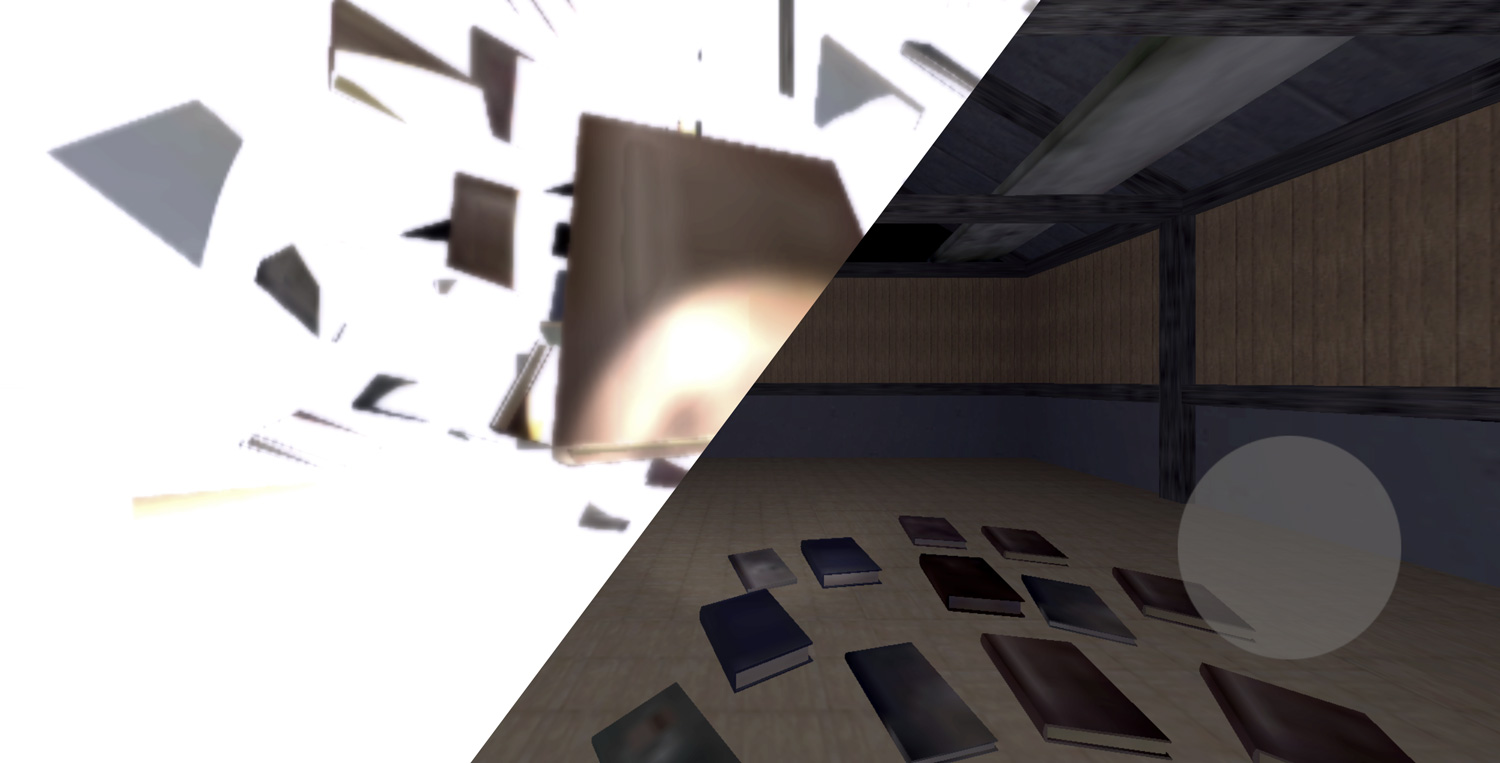
- An explode timer script is also used twice to enable explosion sound effects, explosion particles, lights, exploded objects, and camera effects. Download “ExplodeTimer.cs” here. (As seen below)
And that’s it; plug your phone in, click Build and Run and watch it start up on your device. If you feel like I should add more on a specific section or if you know of any other good resources for creating and learning Unity quickly, feel free to comment.
Download from the Google Play Store here!
Thanks for reading!
Related posts
![Limbo Featured Image]()
Visual Effects in “Limbo” by Playdead
Limbo uses Box2D and OpenGL for the in-game effects. This system works in real time, but I’ve replicated it in Photoshop and uploaded the PSD for free.
![]()
SimmiMega: Embedded Game Engine/Editor (Dev Log #1)
When I was first learning C and 2D arrays, my mind immediately went to old-school dungeon crawling games like NetHack. I made a simple game for an embedded system where you walked around using a 2D array as the world and characters as the objects. After finishing that project for the final in my C…